Showing posts with label crafts. Show all posts

April 14, 2011

I've Been Featured!

Pin It Now!


My favorite craft store has featured me 
as their daily Featured Crafter!  

Go check out my popular wreath that they chose to feature.  :)


December 3, 2010

Felt Flower Holiday Wreath Tutorial

Pin It Now!

I absolutely loved this project.    I chose to do this in a deep red to be festive, but this would look great in all different colors to match the season or your decor.  Enjoy!


You'll need:
1/2 yard of 36"wide felt - cut into about 3"x 3"squares
Vine wreath
Hot Glue (lots and lots of it)

{Please excuse my ugly craft chair  :) }


Cut the felt into 3" by 3"squares.  A half yard will make about 60 or so squares.  


Start at the edge and cut a swirl pattern into each square.  


From the middle of the swirl, roll up the felt to create a flower shape.  The looser you roll it the larger it will be.  I chose to roll them rather tightly for a more "closed flower"look, but you can do this part however you'd like.  

Dab a little hot glue on the flower to close it, so it holds together and doesn't unravel.


Arrange the flowers and glue onto the wreath.  I wanted a bit of vine to show through, so I centered the two rows of flowers on the wreath so it wasn't completely covered.  

Once the flowers and glued on you can trim the sharp corners of the felt.  I chose not to to give it a little bit of a modern look.  


Voila!  So easy and adorable. 


October 15, 2010

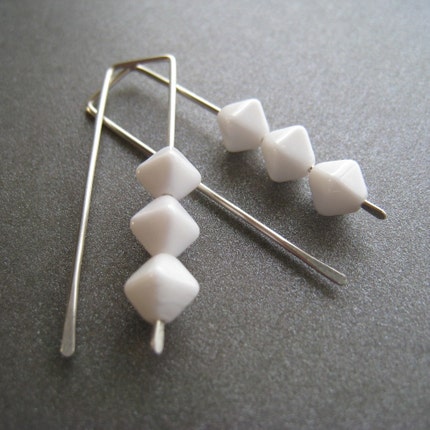
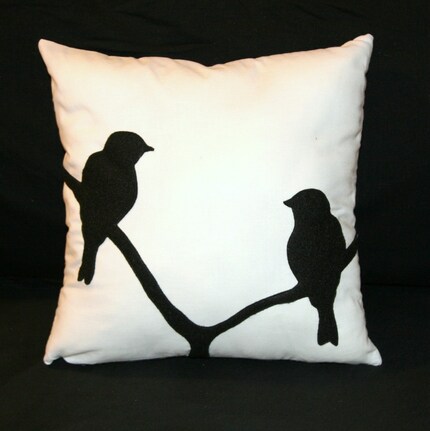
Etsy Finds Friday: White and Modern

Pin It Now!


Have a Lovely Weekend!


April 30, 2010

Free Stuff Friday

Pin It Now!


Create For Less - my favorite craft site EVER - is having an awesome giveaway this week!  


They are giving away a 50 piece Coats & Clark All Purpose Thread Pack.  This is such an awesome giveaway.  I know many of you could use a huge multi-color thread set, I know I can!  

The giveaway is only today so you better hurry on over! 

Happy Friday!!

April 20, 2010

...And I'm Back!

Pin It Now! Whew!  What a busy spring we've had at the Crafty house.  My beloved aunt is moving to our city, so we've been preparing for the 1,000 mile road trip and apartment shopping.  I've been incredibly busy getting ready to transfer to University, trying to finish up all my pre-requisites for my degree and upper-level courses.  We've given our home a face lift with a brighter, fresher look and more citrusy, spring colors.  I guess I'm a busy lady these days!

But back to crafting.  I have some fun projects coming up and a new exciting adventure - an Etsy store!  I've yet to name it, so any suggestions you have I would love to hear!  I will be selling adorable cosmetic bags and tissue holders, along with some curtains made-to-order and some other fun things, all made with bright, lively fabrics and colors. 

January 22, 2010

Slump... and Free Stuff Friday!

Pin It Now! I guess I've been in a bit of a blogging slump, huh?  Starting a new term at school is always a little difficult, and this term I'm taking pretty difficult classes.  But I've been spending a lot of time with my Little Sister, and volunteering.  

But I promise I will be posting more now that life has slowed down to a more normal pace!  Look out for some fun and easy Mod Podge crafts this weekend.


An amazing friend of mine runs a website called Create for Less - which I HIGHLY reccommend for all your crafting supplies.  Every Friday is Free Stuff Friday - who doesn't love free stuff?! - and I would love for all of you to run over there and try to win one of her awesome prizes!! 

November 13, 2009

Mason Jar Cupcakes

Pin It Now! I have so many friends and family that live out of town it's nice to have mail-able gifts.  This is my favorite to send to loved ones, everyone loves baked goodies!

You'll need:
Cake Mix (Boxed works great)
Frosting
Half-Pint Mason Jars

Follow the directions to prepare the cupcakes.  Line the muffin pan with cupcake liners, and bake as package suggests.  I used a mini-muffin pan for mine, but you can use whatever you have available.


Once out of the oven, let cupcakes cool completely - about 1 hour.

Cut cupcakes in half vertically.  Place each half in sterilized jar, piping (or spooning) the frosting in between the halves.  Frost top of cupcake.  Seal jar with lid and band.


{ I used mini cupcakes. I put three in each jar, piping in between }

You can decorate the jar however you like.  I used colored ribbons and made little tags that say "Enjoy!"

Freeze jars overnight, then pack jars securely in a box and mail.  The cupcakes will defrost in the mail, and you'll loved one will receive a little yummy gift ready to enjoy!


Craft Ideas Needed!

Pin It Now! My friend Ellen over at To The Max has asked my crafty friends for some help.  She is looking for some kid-friendly craft ideas that can be done at home with items most people already have around their house.

If you'd like to participate, leave a comment or link with your craft idea.  She will give you and/or your blog full credit, too!  Thanks Crafties!

October 28, 2009

Downloadable Canister Labels

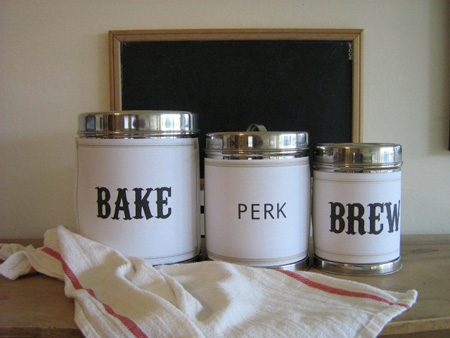
Pin It Now! Anyone that knows me knows how I love to label everything! I like my canisters and jars in my kitchen neat and organized with adorable little labels. Poppytalk has some adorable label templates for you to download. Check them out and see how creative you can get!


{ Photo courtesy of PoppyTalk }

October 16, 2009

DIY Charging Station

Pin It Now! Husband and I have a problem with our tangled cell phone cords all over the kitchen counter.  It looks tacky and is just a mess.  With the little counter space we have, we need it all! 

I found this awesome DIY cell phone charging station on the Overcoming Busy blog.  She found a ribbon organizer at Michael's craft store and just cut a whole in the back for the cords.  Inside she put a small power strip.  What a great idea! 


September 7, 2009

Homemade Bath Balls

Pin It Now! I love anything for the bath. I have several bottles of different bath oils, bubbles, salts, and of course tons of bath balls. But these little buggers are expensive! I decided to try to make my own and they turned out great, and were super easy to make. They are also very inexpensive to create!!

Ingredients:
4 cups Epsom salt
4 tbsp. water
2 to 4 drops food coloring
few drops essential oil

Plus a round bath bomb mold, or something round to mold the bath balls in (I used silicone ramekins)

Pour the Epsom salt in a bowl. Add water and mix well. While continue to mix, add food coloring one drop at a time until you achieve the color you desire - about 2 to 4 drops should be enough. Add essential oil until you are happy with the scent.

Spoon mixture into one side of the mold and pack firmly. Pack the other side of the mold, and press together. Remove the top of the mold. Let sit 2 - 3 days to dry completely.

Transfer into jars or cellophane bags to create an adorable gift for friends and family.

I made mine with purple food coloring and lavender oil. They look like a perfect little gift wrapped in these cellophane treat bags tied with ribbon.


April 26, 2009

Candle Decorating

Pin It Now! I had some plain white candles that needed some "sprucing up" to go with our new decor, so I decided to whip out the old hot glue gun and go to town.

They were very easy to do, I just used ribbon and a piece of black "cobblestone textured" scrap booking paper. I made mine very simple-looking for the living room.

Thanks to fellow Nestie TXsun for the awesome idea!!


Bookmark and Share

DIY No-Sew Curtains

Pin It Now! I decided to make curtains for my office window, and I wasn't going to let my inability to sew stop me! I found this gorgeous black and white damask fabric at JoAnn's for $3 per yard, and IKEA's SY no-sew tape for $1.99 for a 33 foot package. It only took me about 40 minutes for the whole project, and that includes all the times Finley tried to pull the fabric off the ironing board!

The supplies you will need for this project:

Iron
Ironing board
Fabric
No-sew or hem tape


1. Cut your fabric to size. I bought 3 yards (44" wide) to cover a 75"x 40" window.
2. Heat iron on cotton setting, or the hottest setting your fabric will allow.
3. Lay out one fabric piece along your ironing board.

4. Create a hem along the edge of your fabric about 1" wide along the entire side.

5. Insert the tape underneath your hem. Make sure to leave about 2" of tape out of the end of the fabric. You will use this to hold, to make sure you don't crease your tape to ensure the smoothest hem possible. (Also, cut the loose strings from the fabric during this step.)


6. Slowly iron along the hem starting in the middle and working out to the sides. You will want to iron over the fabric several times to ensure the tape to stick properly.
7. Do this for all sides.
8. If you want to create a loop to slide the curtain rod through the fabric, the you will need to create a fold at the top of the curtain. I used curtain clips, so I did not need to create a final loop. But this is up to you and how you prefer your curtain to hang.
9. Again, create a crease with the iron. Insert the tape along the bottom of the hem and iron.


Voila!


I decided to tie back the curtains with a green ribbon that matched the walls. I think they're pretty cute, don't you? :)


Bookmark and Share

April 11, 2009

Create Your Own Picture Wall

Pin It Now! I have been planning to do a picture wall in our living room for quite a while, so now that we have the furniture where we want it and the walls painted, I've decided to work on it this weekend.

Some pre-made or pre-designed picture walls can cost anywhere from $100 - $350 for the template plus frames! The picture wall I am making today only cost me $30. That's a deal!!

This photo is what inspired me:


Materials:
1. Frames. You can use any shape, color or size. Michael's, Dollar Tree and IKEA are great places for inexpensive finished and unfinished frames. I bought my unfinished wood frames from IKEA and Michael's, all for about $1 each. I am using a total of 15 frames that are a combination of 5" x 7" and 4" x 6".

2. Spray Paint. Any color will work, I have chosen black. I recommend Krylon Indoor/Outdoor Satin. I bought mine at JoAnn Fabric Superstore with my 40% off coupon, but it's much cheaper at Home Depot, and they have a larger selection of colors.

3. Primer. You will need a primer for unfinished frames. I used KILZ Interior Oil-base white primer. You can buy this at Home Depot or Lowe's for about $3 - $5.

4. Nails. I have chosen #17 - 1" Wire Nails by Crown Bolt, from Home Depot, but you can use any sort of nail you choose. Only $1.24!


1. Lay down rags or a towel thatyou don't mind ruining onto the ground outside. If you are a novice spray painter, you will probably want to wear something that can be ruined also.

2. Take the glass and backing out of the frames, leaving the prongs up to elevate the frames a little off the ground. (This will help when you spray the sides of each frame)

3. Arrange the frames on the towel about 4" apart.


4. Shake the primer can vigorously for about 45 seconds with the cap on.

5. Before spraying, test the primer on a little spot on the towel, to make sure to get an even spray and to get a feel for how it comes out.

6. Spray each unfinished frame with a light coat of primer, holding the can about 6 - 8" from the frame. Use a quick sweeping motion while spraying. *You do not need to prime frames that are already painted or finished.


7. Let frames dry about 40 minutes.

8. Shake the spray paint can vigorously for about 45 seconds with the cap on.

9. Again, test the paint on a small area of the towel to ensure that the paint comes out evenly.

10. Spray each frame with a light coat using a sweeping motion, holding the can about 6" away. Make sure to spray each side of the frames, as well. It's okay if the frame is not completely coated. It's better to do a lot of very light coats, that way your paint doesn't glop or become gummy. You will probably need to do 4 or 5 coats, depending on the color you chose. Allow about 30 - 60 minutes to dry between coats. After last coat, let dry overnight.


11. Once frames are dry, (the next day) bring them inside and lay them out on the floor or on a table near the wall where you will be putting them up. But the frame back together and insert the photo of your choice.

12. Arrange the frames into the grouping that you would like them on the wall.

13. Start with one of the frames that is to be on the perimeter. Hammer the nail into the wall, and hang that frame. Working inward, hang all your frames. Don't be afraid if you make a mistake, you should be using small nails, and nail holes are easy to paint over! :)

14. Voila! You have a picture wall. You can always add on, or rearrange the pictures.

(I'll post pictures of my finished product tomorrow, hopefully!)

Also, if you're like me and are really slow about printing out your pictures, you can use a nice piece of scrapbook paper as a place holder. I bought a few sheets at Michael's on sale for .25 each that match my living decor, and are fancy enough that it doesn't just look like plain paper. You can also decoupage your scrapbook paper before framing it, creating a shiny, textured look. I recommend Mod Podge Satin decoupage, with a sponge brush.

A good snapshot stops a moment from running away.
~Eudora Welty